|
I usally try to have a general idea of the paint scheme
I want when I go to the LHS. Some paint schemes work better on some bodies better than others. The body lines work with the
paint lines in some instances. For my stadium truck body I have chose to use XXX MAIN picture glue with X-MEN comic book pics,
Carbon Fiber decal sheet, & Diamond Plate decal sheet, Masking Tape to mask with, Metal Flake, Pactra paint & stickers.
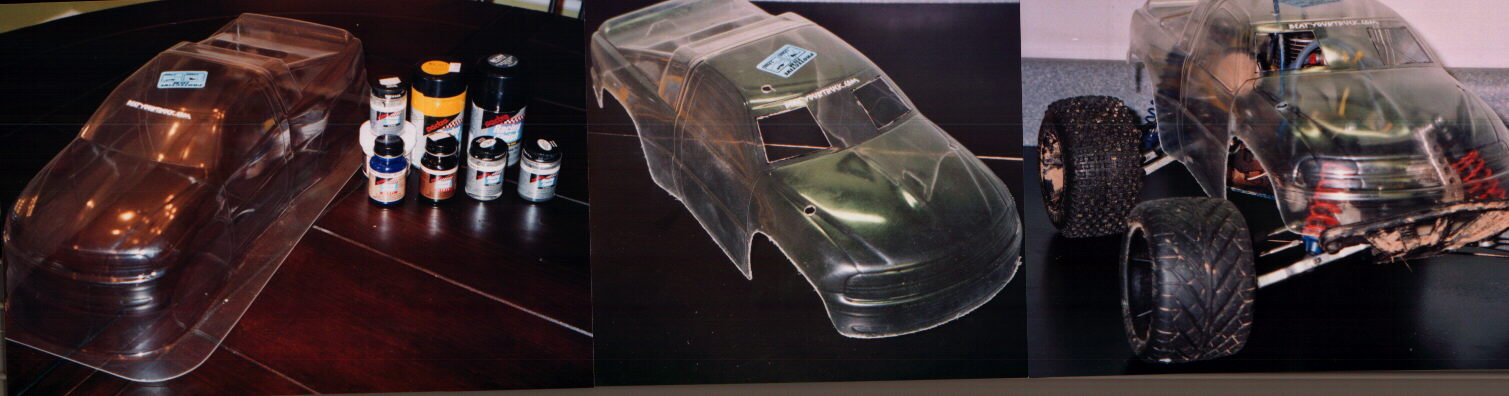
Ok getting started. First thing is to cut out &
trim the body & drill mounting holes. Most lexan bodies come with a clear cover so overspray is not a problem. I use scissors
and a Dremel tool with the sanding drum and cutting disk to get the body ready for paint. Then use a pen on outside of body
to mark post hole. Then drill the mounting holes. This process helps prevent chipping paint if you wait till the end to do
your cutting. Make sure body fits on chassis before you go on.
|
| New Body.....................................Cut&Drilled....................................Premount |
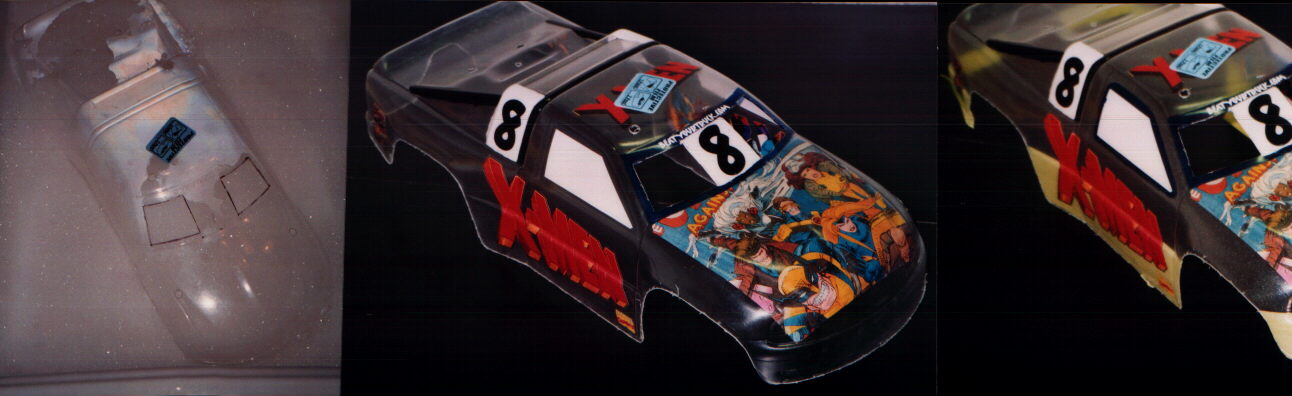
Next step is clean the inside of body with mild soap.
Make sure body is completely dry. Now cover windows with precut mask. Then select place to put pictures to be glued. Cover
picture with glue on top of pic. Then press picture to underside of body in selected spot. Dont press to tight it might tear.
Make sure all air bubbles are pressed out. Wipe off any access glue best you can. Let dry for about 12hrs. Then apply paint
mask where you want them. Cut out around picture if they overlap. Also do any other masking needed at this time also It is
better to start off with darker colors first.
|
| Wash&Dry..................................GluePics........................................ApplyMask |
The next phase is finally spaying some paint. First
I brush painted all the small intricate areas too small to mask. The black & white areas. Im gonna use silver metalflake
before each color to give paint job a glitter effect using an airbrush.The more coats of metalflake you spray the thicker
the flake gets. There are several ways to get a glitter effect this 1 works best for me but creates a little more cleanup.
After the metalflake layer I sprayed the yellow paint first(2 to 3 )coats. Because it was most of the upper body. Then back
it with a white or silver. This keeps the colors from getting darker as more coats of paint are applied. After the yellow
color I sparyed the green paint(2 to 3 )coats. Back it with silver. Now for the chrome paint. Finally I sprayed sliver all
over with (4 to 5 coats)to back everything for protection. Now is the time to spay window tint if you want tinted windows.
The more coats you spray the darker the windows get.
|
| YELLOW.............................................GREEN........................................DONE |
Now for some fun! Adding external decals. I used carbon
fiber decal on sides and front bumper. I used diamond plate decal on the bed of truck & back of wing. Then added my DuBro
Body Klips.
|
| DECALS...........................................DECALS......................................DECALS. |
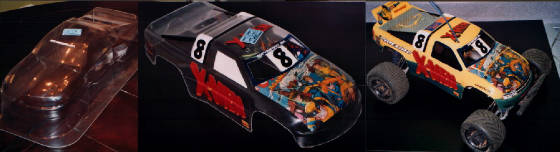
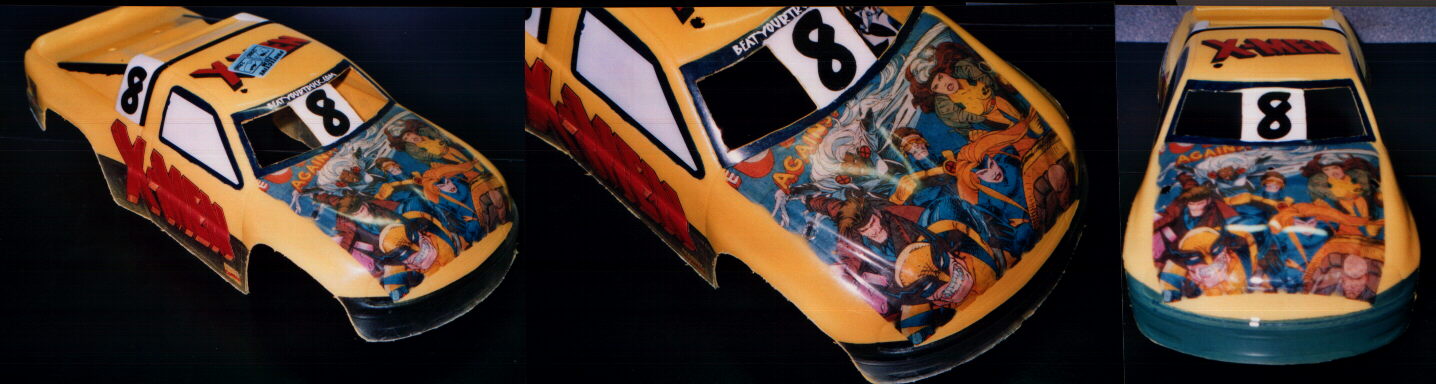
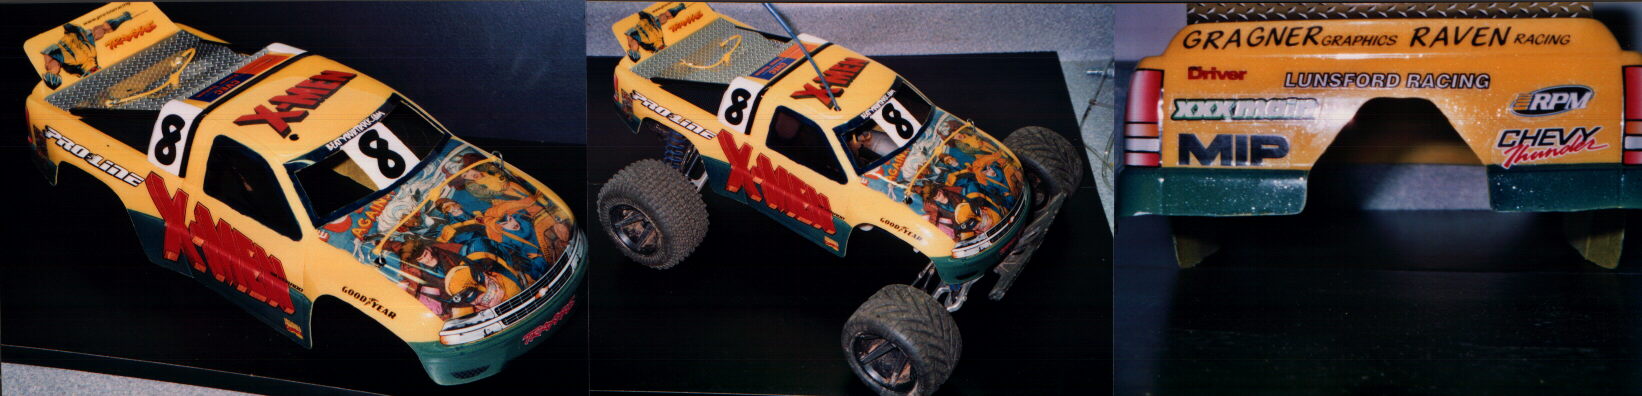
Here it is! The final product. One tricked out race stadium truck body!
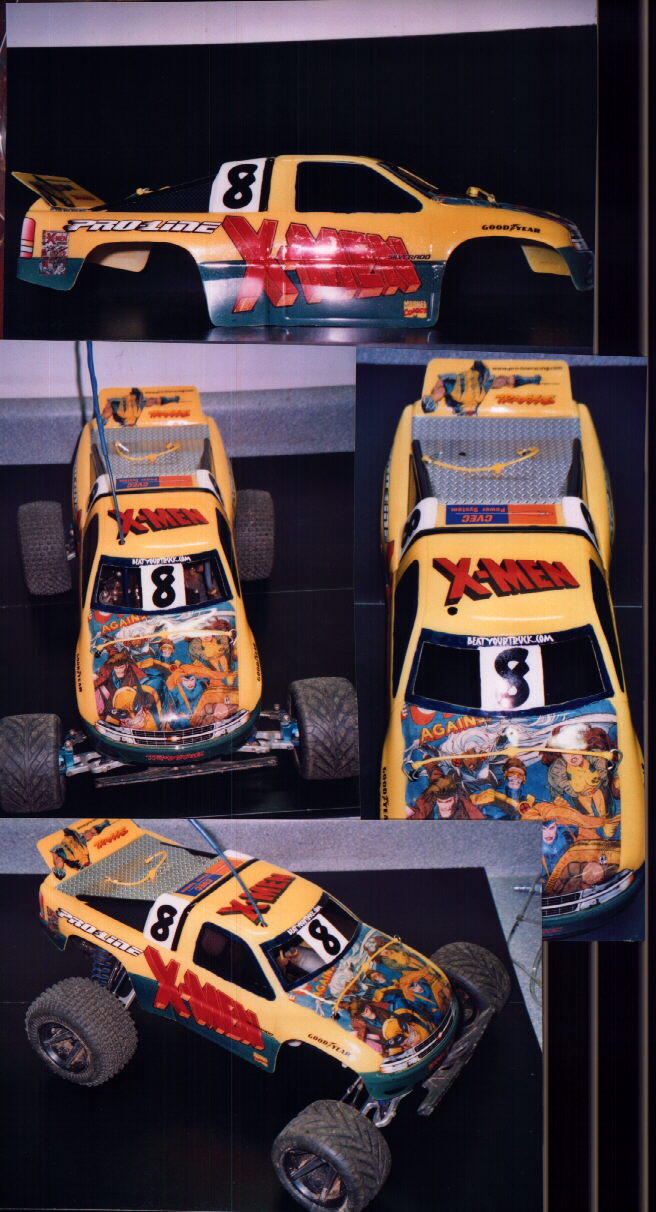
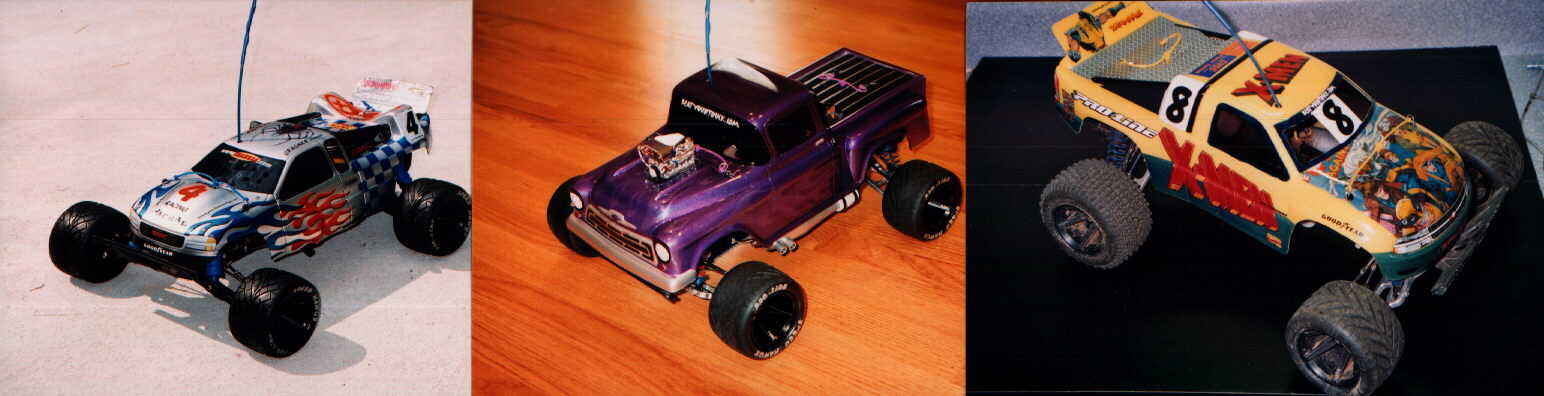
| Stable of Bodies for the NITRO RUSTLER |
|
MORE PAINT/BODY TIPS:
GHOST FLAMES: Prep your
body. Place flame mask where you want the flames. Spray 2 coats of your base(body color). Then reove mask and spray 2 light
coats of a pearl of that same base color. Then spray 2 to 3 more coats of base color and back with silver or white.
LIGHTNING
STREAKS: Use a fine tipped brush to paint the main vein of streak then use an airbrush to cloud around vein. Try to keep vein
in the middle when you airbrush.
CARBON FIBER: You can paint carbon fiber buy using a rubber place mat with the small
block pattern. Spray a black over the mat pattern. Pull mat off then use a charcoal paint. You do this with any colors so
they match your paint job. Ex. blue/silver, red/black, yellow/black.
PAINT MASK: Make sure paint mask are pressed
down firmly. Especially on body molds and edges. If not this can cause alot of paint bleeding.
LIQUID MASK: This can
be used to create your own mask instead of using a sticker sheet. Works well in hard to reach body areas.
HAIRDRIER:
Use a hairdrier to speed up dring time
ADDING DEPTH: Add a shadow to an object makes it appear 3-D. Use a darker color
under main color.
COOL PAINT: Storing your paint in a cool dry place makes it alot easier when spraying if you are
using an airbrush. If it is hot you can thin it out with R/C thinner.
PICTURE GLUE: Use a real fine 220 or better
grit to scuff area cover with pice for better adheision.
SCRAP LEXAN: Save your larger scrap lexan pieces so you can
practice painting on them.
TIME=PERFECTION: The more time you spend on your ustom body the better it will turn out.
Dont rush it!
CHROME: Appliing chrome is easy. Spray 3 coats of chrome paint then back it with a water based paint.
Here is the hard part. First try to paint chrome last if possible. Chrome is not like regular paint. It will show every flaw
there is. I used XXXMAIN picture glue. The chrome shows where I didnt get the glue cleaned off well enough. Also I used Pactra
metal flake paints after the chrome and it clouded the chrome a little. Second any scratches or blimishes show up too good
on the chrome. Third give it plenty of time to dry. I painted the chrome backed it with 3 coats of black then 3 more coats
of silver and it still peeled off 3 days later when I pulled some masking tape from spraying another color. BUT! I used the
SPATZ Chrome paint in the can. LHS guy told me he thought it was the best of all of them. Other than a few flaws here and
there it does look great. SPATZ offers some type of body prep. It might be a good idea to use as I didnt I just washed with
soap & water. I also painted chrome first instead of last as well
BODY TIPS:
WING: Use velcro on your
stadium truck wing to mount it to the truck body instead of bolts. This way it will break away with out tearing up it or the
body when up land upside. And you can remount it with no problem.
SMOOTH LINES: When prepping body for paint make
sure all edges are smoothed and corners are rounded. This will keep you from eges snagging stuff like your fingers and cutting
them LOL. Also use releif cuts in tight areas. Mount body on chassis before you paint it so you can see if anything is hitting.
|